
Blog
how to install ssl certificate in cPanel and WHM
Table of Contents
How To Install SSL Certificate In WHM
What you will need to install SSL on whm:
1- Your server certificate
This is the certificate issued to you by the Certificate Authority (CA) for your domain. Depending on how and where you got it, it might have been delivered to you via email. If not, you can retrieve it by accessing your Account Dashboard and selecting your order or by contacting the certificate provider.
Quick summary
Looking for affordable server licenses? SharedLicense offers cPanel, DirectAdmin, LiteSpeed, CloudLinux, and Windows licenses at wholesale prices with instant delivery.
Browse licenses →2- Your intermediate certificates
These documents enable devices connecting to your server to recognize the CA that issued the certificate. There may be multiple intermediate certificates. If your certificate came in a compressed ZIP folder, it should also contain the Intermediate certificate(s), sometimes referred to as a CA Bundle. If not, you can obtain the appropriate CA Bundle for your certificate.
3- Your private key
This file should either reside on your server or be in your possession if you generated your Certificate Signing Request (CSR) using a free generator tool. On specific platforms, such as Microsoft IIS, the private key might not be immediately visible to you, but the server manages it internally.
Steps to install SSL in whm
1- Access WHM
To begin, access WHM, usually done by navigating to https://domain.com:2087.
Note: When attempting to visit your WHM login page, you might come across an error message like “Your connection is not private” or a similar notification. This issue arises because the login page employs a self-signed certificate as the default. Please ignore this message and proceed beyond it.
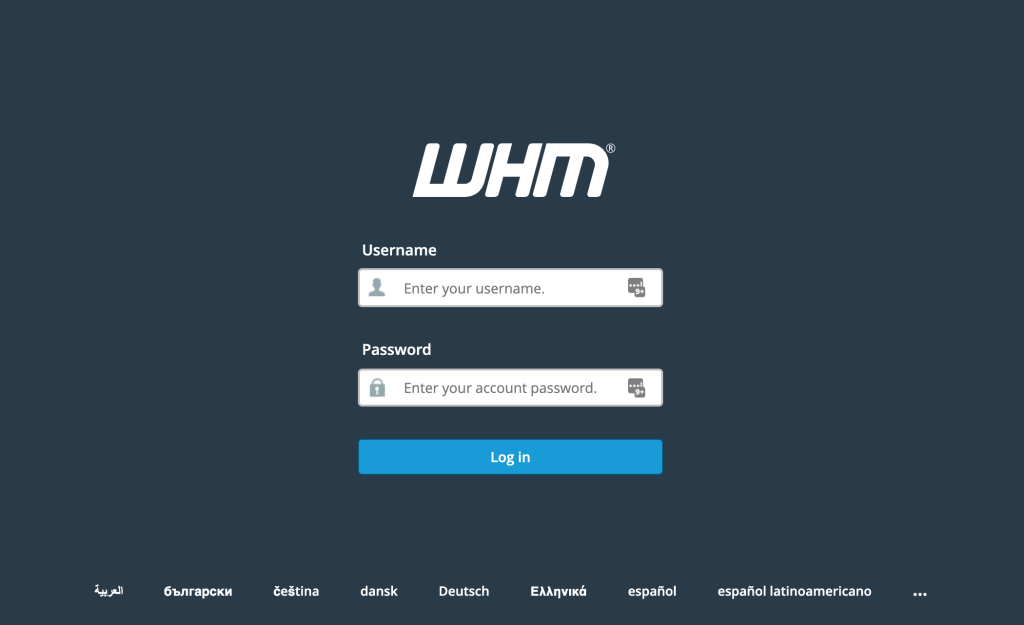
2- Enter your username and password to log in to WHM
Enter your Username and Password, then click on the Log in button.
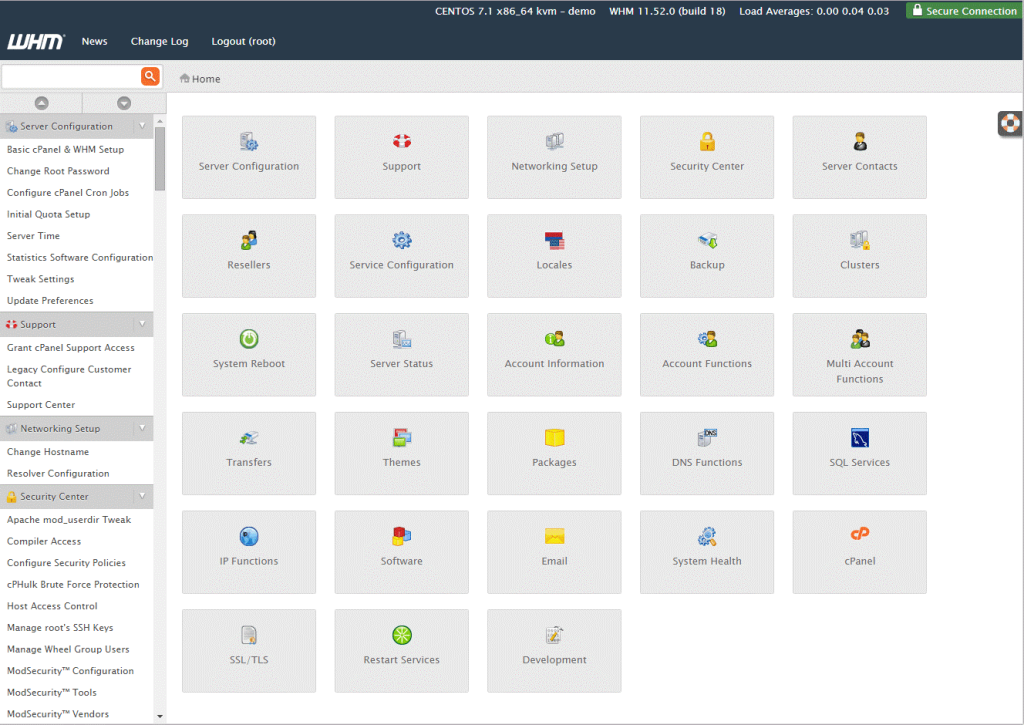
3- Access your home page.
Make sure that you are on your WHM homepage. Your homepage should look like this:
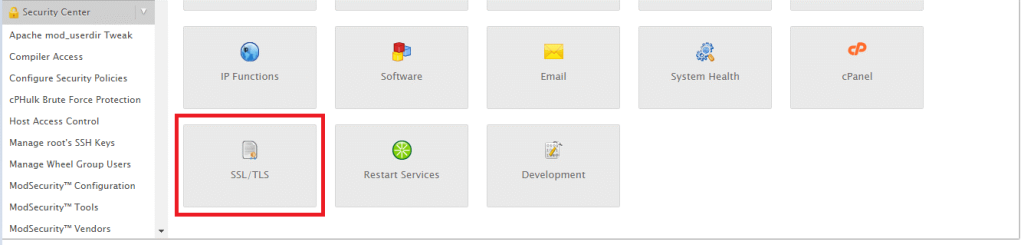
4- Click on SSL/TLS
The next step on how to install SSL in WHM is to find the SSL/TLS section shown below.
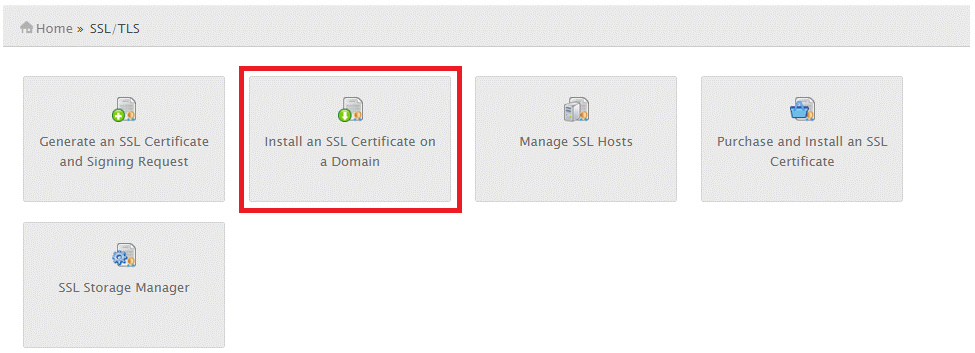
5- Click Install an SSL Certificate on a Domain
Simply select Install an SSL Certificate on a Domain from the SSL/TLS Manager page.
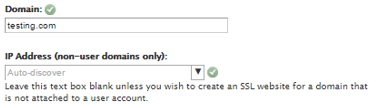
6- Enter the domain name.
Enter the domain name you want to secure with your SSL Certificate in the Domain field.
7- Input your Certificate Files
Your certificate files should be copied and pasted into the relevant text boxes.
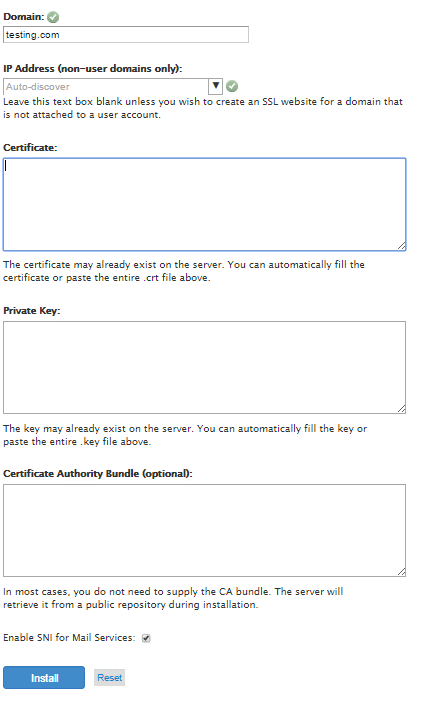
Certificate– This is the server certificate for your domain(s) that was issued.
– If you previously uploaded the server certificate to the server and supplied the right domain name above, WHM should automatically acquire the Certificate (CRT) text.
– Drag your server certificate into a text editor like Notepad after clicking “Extract All” if you received the certificate in a ZIP file. You will be able to copy all necessary text contents, including “—–BEGIN CERTIFICATE—–” and “—–END CERTIFICATE—–,” using this method.
Private Key – This represents your individual key, generated during the creation procedure.
– WHM should automatically retrieve the Private Key content if you had earlier generated the Certificate Signing Request (CSR) within the “Generate an SSL Certificate and Signing Request” segment of your SSL/TLS Manager and correctly entered the domain name above.
– If you generated the CSR and private key outside of your WHM account and neglected to save the files, you may encounter obstacles in the process and might have to request a new SSL certificate with a freshly generated key pair.
Certificate Authority Bundle (optional) – These represent the intermediate certificates necessary for browsers and devices to identify the issuer of your trusted certificate.
– WHM will retrieve the CA Bundle from a public repository automatically. In case you didn’t save these files, you can download the relevant CA/Chain Certificate for your certificate.
– If you possess several intermediate certificates, simply paste them consecutively to establish the correct certificate chain or path.
8- Click the “Install” button once you have entered the Certificate Files
– Enabling “Server Name Indication (SNI) for Mail Services” is not mandatory. SNI should only be employed when multiple hostnames are served over HTTPS from the same IP address.
Need the best price on server licenses?
Get cPanel, DirectAdmin, LiteSpeed & more with instant delivery and 24/7 support.
– It might be necessary for you or your web host to restart the Apache server before the certificate becomes operational.
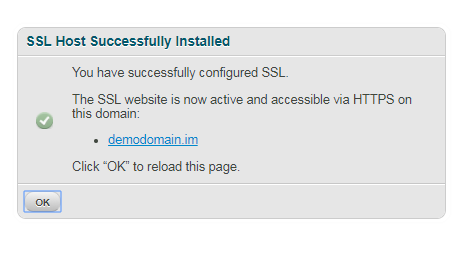
9- Verify your installation
If the certificate is installed correctly, you will see the following message displayed: “You have successfully configured SSL. The SSL website is now active and accessible via HTTPS of this domain: “example.com.”
Congratulations! The process of installing SSL in WHM has finished! To verify your work, visit your website in your browser at https://yourdomain.com and inspect the certificate and site information to ensure that HTTPS/SSL is functioning correctly. Keep in mind that a server restart may be required for the changes to take effect.
How To Install SSL Certificate On cPanel
You might have just got your cpanel license and now is the time to take the next step by activating the SSL in cPanel.
What you will need to install SSL on cPanel:
1- Your server certificate
This is the certificate issued to you by the Certificate Authority (CA) for your domain. Depending on how and where you got it, it might have been delivered to you via email. If not, you can retrieve it by accessing your Account Dashboard and selecting your order or by contacting the certificate provider.
2- Your intermediate certificates
These documents enable devices connecting to your server to recognize the CA that issued the certificate. There may be multiple intermediate certificates. If your certificate came in a compressed ZIP folder, it should also contain the Intermediate certificate(s), sometimes referred to as a CA Bundle. If not, you can obtain the appropriate CA Bundle for your certificate.
3- Your private key
This file should either reside on your server or be in your possession if you generated your Certificate Signing Request (CSR) using a free generator tool. On specific platforms, such as Microsoft IIS, the private key might not be immediately visible to you, but the server manages it internally.
Steps to install SSL in cPanel
1- Access cPanel
To begin, access cPanel, usually done by navigating to https://domain.com:2083.
Note: When attempting to visit your cPanel login page, you might come across an error message like “Your connection is not private” or a similar notification. This issue arises because the login page employs a self-signed certificate as the default. Please ignore this message and proceed beyond it.
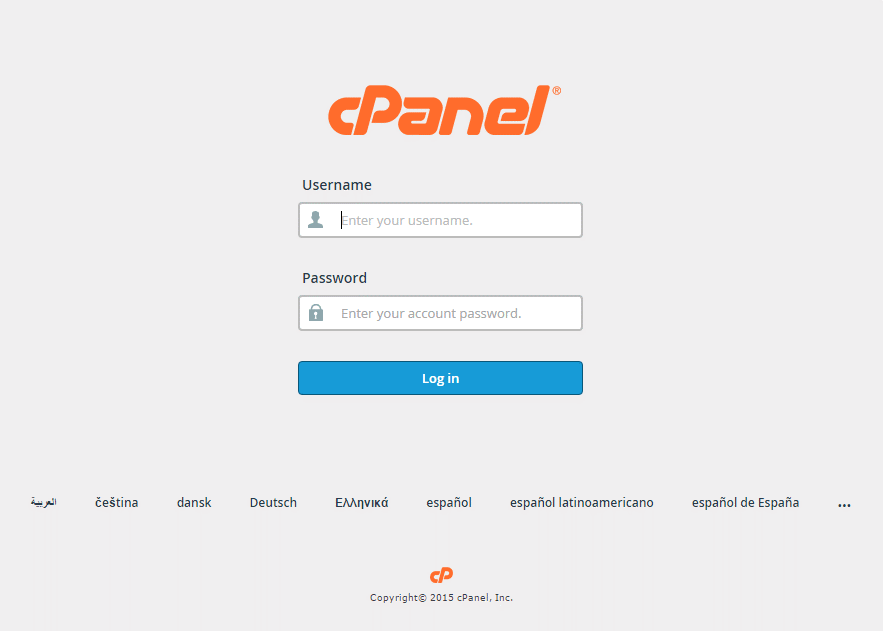
2- Enter your username and password to log in to cPanel
Enter your Username and Password, then click on the Log in button.
3- Access your home page
Make sure that you are on your cPanel homepage. Your homepage should look like this:
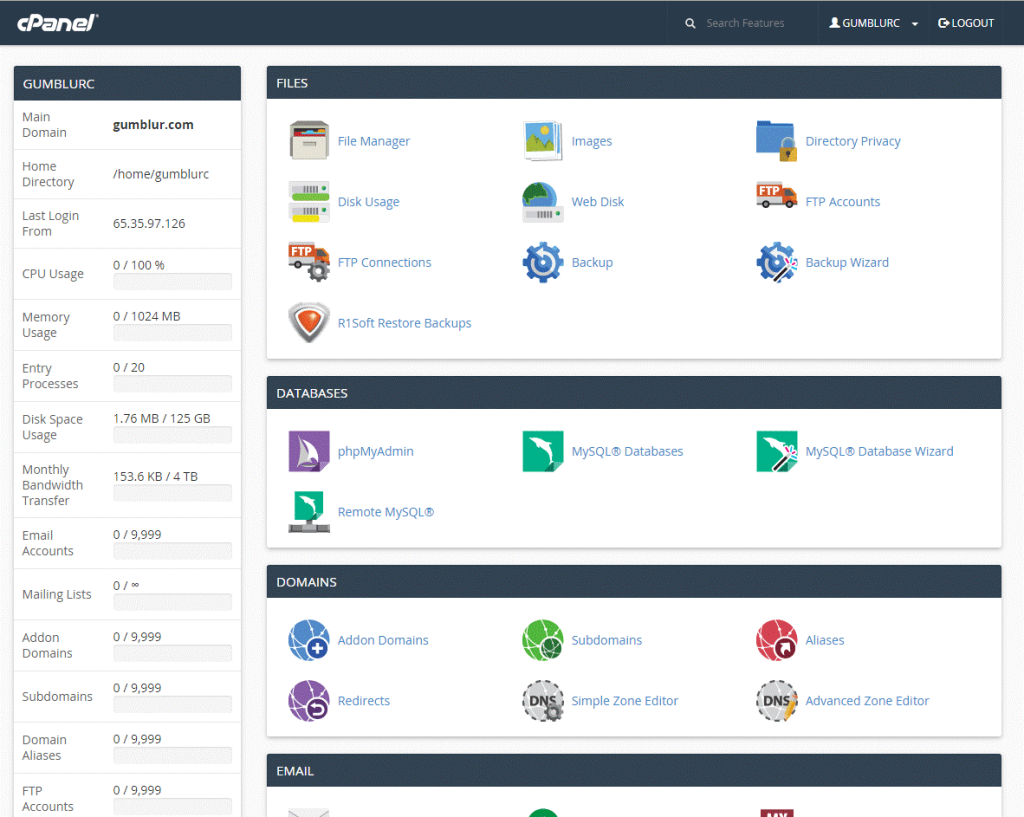
Please be aware that earlier iterations like X3 Theme-Classic may not visually resemble the image depicted above, but they should maintain the same fundamental concept and category organization.
4- Navigate to the SSL/TLS Manager
To reach your SSL/TLS Manager page, simply scroll down to the Security section and click on the SSL/TLS button.
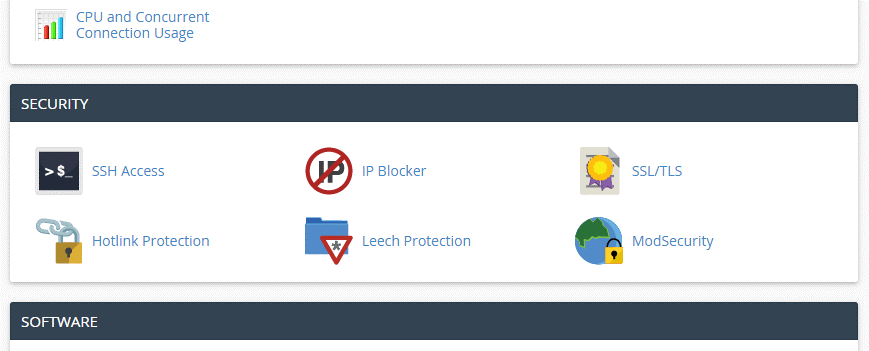
Take note that you can also access the SSL/TLS Manager page by using the Search Feature located at the top right of the cPanel home page and searching for “SSL.”
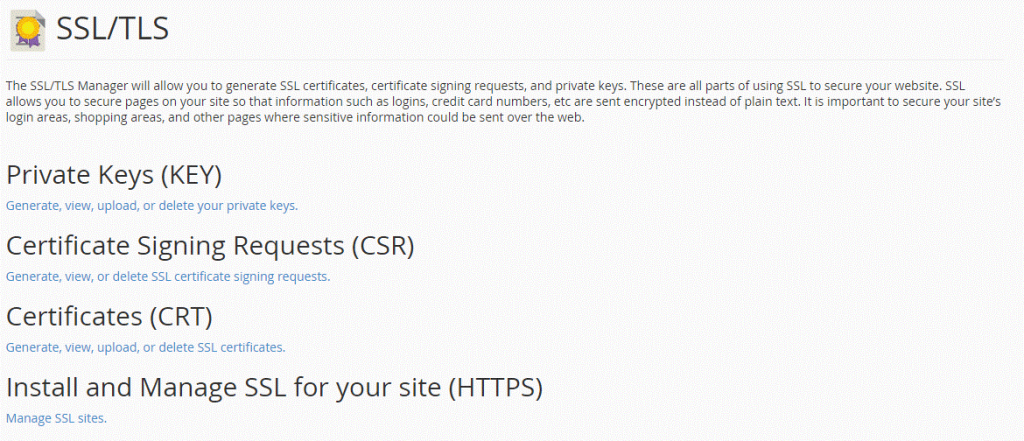
5- Select “Manage SSL Sites”
Your SSL/TLS Manager page provides comprehensive control over SSL/TLS configuration for cPanel. You’ll find the “Manage SSL Sites” hyperlink beneath the section labeled “Install and Manage SSL for your site (HTTPS),” as illustrated below.
6- Select your domain
Modify the Domain drop-down selection to match the specific domain name on which you intend to install your SSL certificate.

7- Copy and paste your certificate files
Once you’ve chosen your domain, all you need to do is copy and paste your individual certificate files into the corresponding text box(es) displayed below.
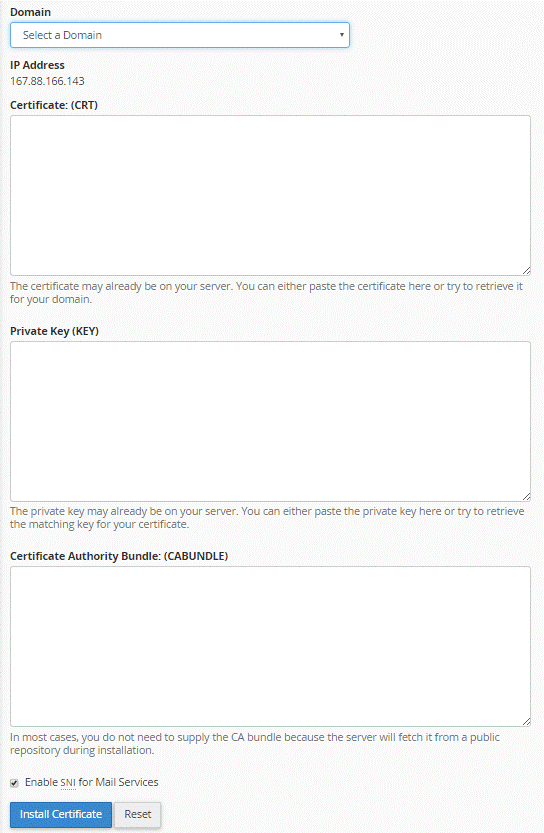
Certificate – This is the server certificate for your domain(s) that was issued.
– If you previously uploaded the server certificate to the server and supplied the right domain name above, cPanel should automatically acquire the Certificate (CRT) text.
– Drag your server certificate into a text editor like Notepad after clicking “Extract All” if you received the certificate in a ZIP file. You will be able to copy all necessary text contents, including “—–BEGIN CERTIFICATE—–” and “—–END CERTIFICATE—–,” using this method.
Private Key – This represents your individual key, generated during the creation procedure.
– cPanel should automatically retrieve the Private Key content if you had earlier generated the Certificate Signing Request (CSR) within the “Generate an SSL Certificate and Signing Request” segment of your SSL/TLS Manager and correctly entered the domain name above.
– If you generated the CSR and private key outside of your cPanel account and neglected to save the files, you may encounter obstacles in the process and might have to request a new SSL certificate with a freshly generated key pair.
Certificate Authority Bundle (optional) – These represent the intermediate certificates necessary for browsers and devices to identify the issuer of your trusted certificate.
– cPanel will retrieve the CA Bundle from a public repository automatically. In case you didn’t save these files, you can download the relevant CA/Chain Certificate for your certificate.
– If you possess several intermediate certificates, simply paste them consecutively to establish the correct certificate chain or path.
8- Click “Install Certificate”
Click the “Install” button once you have entered the Certificate Files
– Enabling “Server Name Indication (SNI) for Mail Services” is not mandatory. SNI should only be employed when multiple hostnames are served over HTTPS from the same IP address.
– It might be necessary for you or your web host to restart the Apache server before the certificate becomes operational.
Congratulations! Your SSL certificate has been successfully installed! To verify your work, visit your website in your browser at https://yourdomain.tld and inspect the certificate and site information to ensure that HTTPS/SSL is functioning correctly. Keep in mind that a server restart may be required for the changes to take effect.