
Blog
Change the Main Shared IP Address in cPanel
For new shared accounts, main shared IP address is necessary in WHM & cPanel. How to change it, add a new IP and move old accounts through it.• With your hosting provider, they should give you a new IP address and subnet mask.in shared IP address in WHM & cPanel is crucial for hosting new shared accounts on a server. Follow these steps to change it, add a new IP, and migrate existing accounts to the new IP.
Quick summary
Looking for affordable server licenses? SharedLicense offers cPanel, DirectAdmin, LiteSpeed, CloudLinux, and Windows licenses at wholesale prices with instant delivery.
Browse licenses →Requirements:
• Root access to cPanel & WHM • New IP address and subnet mask from your hosting provider
Step 1: If you want to add a New IP Address to Your Server you need to do the following.
1. Your hosting provider can provide you with a new IP address as well as subnet mask.
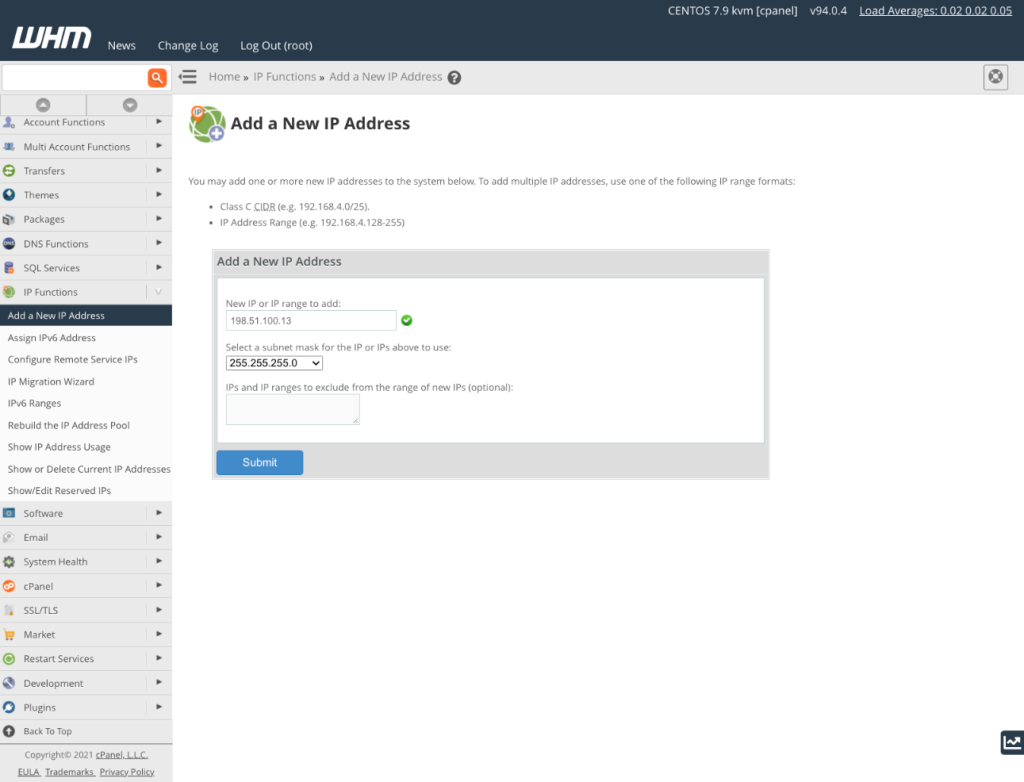
2. Under IP Functions in WHM, select Add a New IP Address.
3. You enter your IP address and subnet mask. Save your changes.
Step 2: Change Main Shared IP address.
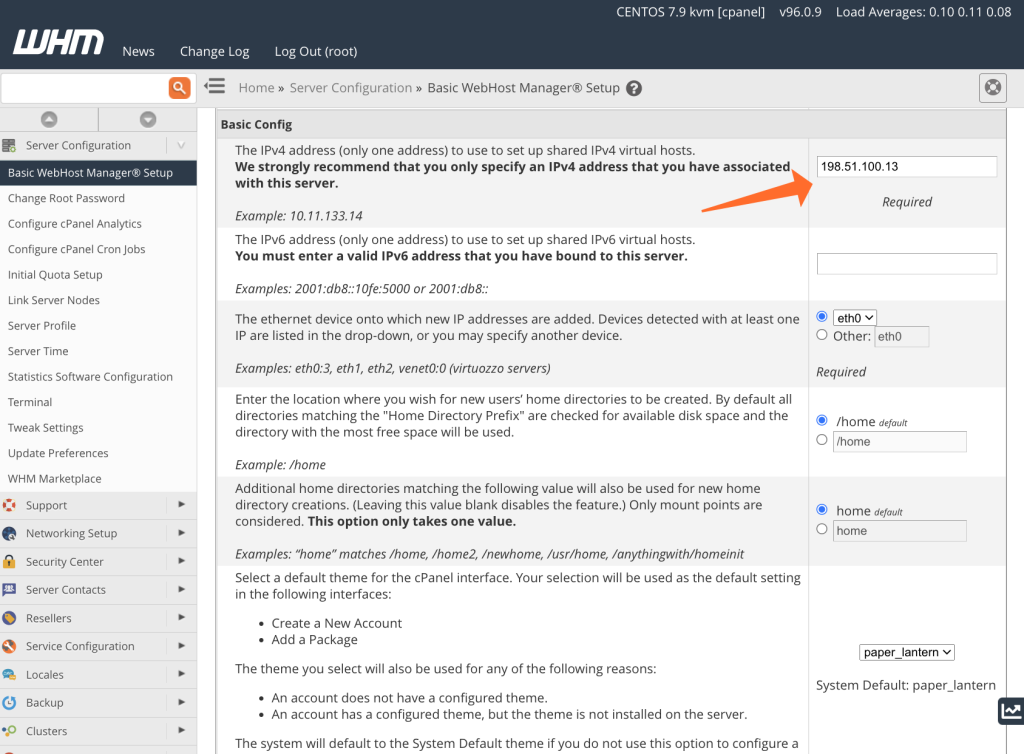
1. Go to Basic WebHost Manager setup in WHM.
2. Scroll to Basic Config.
3. In the shared IP field enter the new IP address.
4. Click on Save at the bottom of the scroll. Note: Make sure you have the new IP added first in WHM then try it here.
Step 3: Migrating Shared Hosting Accounts to a New IP Address
1. In WHM, open Open IP Migration Wizard.
2. Enter new IP address for migration.
3. Check out the migration list of accounts and domains.
• Update configuration for Apache, FTP and cPanel• Continuity of DNS with old IP temporarilyl The main shared IP address in WHM & cPanel is crucial for hosting new shared accounts on a server. Follow these steps to change it, add a new IP, and migrate existing accounts to the new IP.
Need the best price on server licenses?
Get cPanel, DirectAdmin, LiteSpeed & more with instant delivery and 24/7 support.
Change Main Shared IP Address
The next thing to do is change the main shared IP address, but now that your new IP address is available for use within cPanel & WHM. This new address will be used to generate cPanel accounts in the future. If you change the IP address, it doesn’t migrate existing shared hosting accounts, and we’ll explain how in the next section.
In WHM’s Basic WebHost Manager Setup we can change how the shared hosting IP address.
Scroll to the basic config in Basic WebHost Manager Setup. The IP address to use when setting up a new virtual host is configured here. Just enter the new address and hit save at the bottom of the page.
Do not enter an IP address that you have not already entered in the cPanel process we outlined earlier.
Migrate Shared Hosting Accounts to New IP Address
The most complex part of today’s three stages is migrating cPanel accounts to use the new IP. However, this is quite easy with the IP Migration Wizard in WHM. Before we begin, you should be aware that:
During the migration process, you should not create new cPanel accounts. They may not use the new IP address if you do. In such case, it’s better to wait until the migration completes and after this all created accounts will be calculated with an correct address.
It can take up to 48 hours to complete their full migration process. While further above the network latency, DNS caches — scattered across the entire Internet — have a certain time that needs to elapse before updating.
Before going any further, I want to make clear that the IP Migration Wizard doesn’t add any new IPs to your server. Before you migrate your cPanel accounts, you need to follow the instructions in the first section of this article and add these IP addresses.
The IP Migration Wizard will guide you step by step through the migration process. Each step you should complete, and pay attention to any error messages displayed by the wizard.
The IP migration steps are as follows:
Enter the new IP address.
Confirm the changes. When you go over to your WHM you are shown a list of newly mapped IPs to old IPs to verify the accounts and domains that are being migrated. Before making the changes, be sure that the changes you expect are the ones you planned. Once the migration takes place, you’ll confirm and if you later decide you want to reverse the migration, you can rerun the IP Migration Wizard but it might take up to 48 hours to revert back to the old setup. You can also get the translation matrix, which will give you a list of domains to IP addresses of both their new and old IP addresses.
As configuration change is implemented by cPanel. Updating Apache, FTP, and cPanel configuration files is included in this. This causes the new IP address to be in use, but the old IP is kept around to allow domains to continue being served, and DNS records to be updated.
DNS migration. The DNS zone files are controlled. Beware of any warnings that are shown when you move onto the next step.
DNS propagation. Therefore, we recommend you log out of WHM and wait 48 hours for DNS records to propagate. Once the waiting period is over, log back in and re open IP Migration Wizard. This should all go well and it will display a message informing you that the migration is complete.
